Closet Upgrade – Adding Value On A Budget
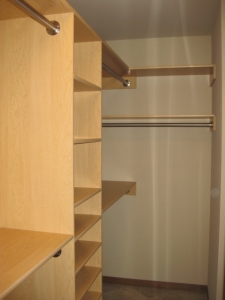
When I wrote about building our home, I mentioned we were finishing the closets ourselves. The reason for this was to save some money and to make a better organized space. We didn’t want the standard builder shelf and rod, but we also didn’t want to pay thousands for a custom closet system.
Believe it or not a closet can add value to your home, and help your property sell quicker. We have shown many homes where the closets were stuffed full it’s like an avalanche when opening the door. Every time we see this our clients view it as a lack of storage. A full cluttered closet can make it seem like your home doesn’t have enough space. There are a lot of ways to use your closet space more efficiently such as a double row of hanging, extra shelving, or storage bins. Many types of closet systems are available at the home improvement stores. These can help you with ideas and simplify your work. We chose not to go with a system or kit because we wanted more flexibility in our design.
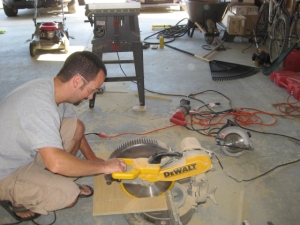
I am far from a woodworker, but I set out to tackle a from scratch custom closet on my own. Here’s what I did.
Step 1 – Make a Drawing: I am fortunate that I have an engineering background and access to CAD software. So, I actually modeled our closet in 3d before building, but a simple sketch will do. The point is to plan it out, don’t just start cutting shelf boards.
Step 2 – Choose a Material and Method: We went with a fairly cheap prefinished melamine shelf board, and brushed nickle closet rods. I’ve seen stained solid wood in high end closets before, but what’s the point unless your in a million dollar home. I asked a woodworker friend of mine the best way to go about doing this. He said Kreg Joints would be the easiest cleanest attachment method. A standard closet system with hangers and supports can save you some work with figuring out the joints.
Step 3 – Measure and Cut: Start with your supports and build from there. I started withing a shelving unit in the middle of the wall that would eventually carry the end of 4 closet rods. The old saying measure twice cut once is definitely a good one to remember here.
Step 4 – Drill the Joints: In this case I used a Kreg Joint jig that I borrowed from a friend. A Kreg joint is an angled hole made to recess and hide the screws in the board. There are two different sizes on the drill bit, one for the screw hole itself, and one to cut the recess and screw stopping point. This is a really strong easy method of attachment using fasteners that are relatively hidden.
Step 5 – Assemble: Now it’s a mater of putting things together. I completed the supporting shelving unit in the middle first. Second I attached supports to the wall on the opposite end. Lastly I did the closet rods and shelf in between supports.
I’m not quite done with the full project, because I want to build a drying rack next to the washer and dryer in the master closet yet. Although, I’m almost done with the master closet, one spare bedroom done, and the entry closet. I’ve also got the materials for the third bedroom. The total cost was around $550. This was far cheaper than hiring a contractor to do this, and provided lots of organized useful space. Consider upgrading your closets to get the most out of your square footage.


 Back Home


[…] of August was spent finishing closets, working on landscaping, clearing out our storage unit, and trying to get grass to grow during a […]